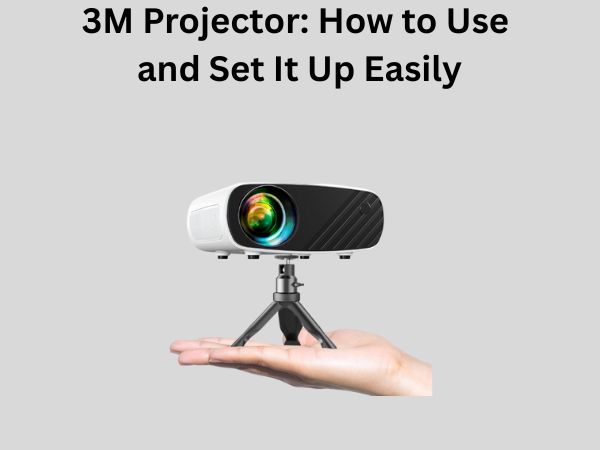
3M Projector: How to Use and Set It Up Easily
So you’ve just purchased a 3M projector, and you’re excited to start using it. Whether you’re setting up for your home theater, classroom, or office presentation, I completely understand that mix of enthusiasm and uncertainty. Many people feel overwhelmed when they first unbox a projector because there are quite a few components and steps involved. But here’s the good news: once you understand the basics, operating a 3M projector is straightforward and intuitive.
Think of your 3M projector like a camera in reverse. Instead of capturing light and converting it to an image, your projector takes digital or analog signals and converts them into a bright, large image on a screen or wall. It’s a fascinating piece of technology, but you don’t need to be a tech expert to use it effectively.
What’s Inside the Box?
When you first open your 3M projector package, you’ll find several essential components. The projector unit itself is the star of the show, but there are other equally important pieces. You’ll typically find a remote control that lets you operate the device from a distance, a power cable to connect it to electricity, and often an instruction manual that serves as your reference guide.
Some 3M projectors also include an HDMI cable or VGA cable for connecting your laptop or other devices. Depending on the model, you might find a carrying case if it’s a portable projector, or mounting hardware if it’s designed for permanent installation. It’s worth taking a few minutes to lay everything out and familiarize yourself with all the components before you start the setup process.
Understanding the Key Components of Your 3M Projector
Before you press any buttons, let me walk you through the main parts of your projector and what they do. This knowledge will make the entire setup process much clearer.
The Projection Lens
The lens is one of the most critical components of your projector. It’s the part that focuses light to create a clear, sharp image on your screen. You’ll find the lens on the front of the projector, and it’s usually protected by a lens cap when you first receive your device. Always keep this cap on when the projector isn’t in use to prevent dust and scratches. Think of the lens like the eye of your projector—if it’s dirty or damaged, the image quality suffers dramatically.
The Lamp and Its Housing
The lamp is the powerhouse of your projector. It produces the intense light needed to project an image across a room. Now, here’s something important: not all 3M projectors use the same lamp. Depending on your model, you might have a standard lamp, an advanced lamp, or even an LED-based light source. The lamp has a limited lifespan, typically ranging from 2,000 to 5,000 hours depending on usage and the specific lamp type. When it reaches the end of its life, you’ll need to replace it with a genuine 3M replacement lamp to maintain optimal performance.
The Control Panel and Remote Control
On the top or side of your projector, you’ll find the control panel with buttons for power, input selection, and adjustments. However, most of the time, you’ll use the remote control for convenience. The remote allows you to turn the projector on and off, switch between different input sources, adjust brightness and contrast, and navigate through menus without leaving your seat.
Input and Output Ports
On the back of your 3M projector, you’ll find various connection ports. These might include HDMI ports for modern devices, VGA ports for older computers, USB ports, and possibly composite video inputs. Some advanced models might also feature wireless connectivity options. These ports are your gateway to connecting different devices to your projector.
Setting Up Your 3M Projector: Step-by-Step Guide
Step 1: Choosing the Right Location
Your projector’s location makes a significant difference in performance. You’ll want to place it on a stable surface like a shelf, tripod, or ceiling mount. The most important consideration is the distance between the projector and your screen or wall. Every 3M projector has a specific throw ratio, which determines how far back the projector needs to be to display a particular image size.
For example, if your projector has a 1.5:1 throw ratio and you want a 100-inch image, you’d need to place the projector about 150 inches (12.5 feet) from the screen. Always check your specific model’s manual to understand its throw ratio. Additionally, ensure that the location has adequate ventilation. Projectors generate heat, and proper airflow prevents overheating.
Step 2: Installing the Lamp
Most 3M projectors require you to install the lamp before first use. This process varies slightly depending on your model, but the basic principle remains the same. First, make sure the projector is unplugged from the power outlet for safety. Look for the lamp access panel, which is usually located on the side or bottom of the unit. Open this panel carefully, and you’ll see the lamp assembly.
Gently pull the lamp module out of its housing. Handle it carefully because lamps are fragile. If you’re replacing an old lamp, this is where you’d remove it. Insert your new lamp into the same position, ensuring it seats properly. You should hear a slight click when it’s fully inserted. Close the lamp access panel and secure it. Some models require you to reset the lamp counter after installation, which you can do through the menu system using your remote control.
Step 3: Connecting Power and Ensuring Ventilation
Plug your projector into a power outlet using the provided power cable. Avoid using extension cords unless absolutely necessary, as they can affect power delivery. Make sure there’s at least 6 inches of clearance around all vents on the projector to allow proper air circulation. If you’re mounting the projector on a ceiling, ensure there’s adequate space above it for heat to escape.
Step 4: Connecting Your Devices
Now comes the fun part: connecting your devices. Depending on what you want to project, you’ll connect different devices using different cables. If you’re connecting a laptop, use an HDMI cable for the best quality. Some older computers might require a VGA cable instead. For streaming devices like Apple TV or Roku, use HDMI. If you’re connecting a tablet or smartphone, you might use a wireless connection if your projector supports it, or an HDMI adapter cable.
Take a moment to inspect all cables before connecting them. Make sure they’re not damaged or bent. Push cables firmly into their ports until you feel resistance, ensuring a secure connection.
Powering On Your 3M Projector for the First Time
The Initial Power-Up Process
Press the power button on either the projector itself or the remote control. You’ll see an indicator light appear, and the lamp will begin to warm up. This warm-up period typically takes 30 seconds to a few minutes, depending on your model. During this time, the projector is initializing its systems and the lamp is reaching optimal brightness. Don’t be alarmed if the image appears dim at first; it will brighten as the lamp fully warms up.
Once the projector is fully powered, you should see some indication on the screen that it’s ready to receive a signal. This might be a 3M logo, a blue or black screen, or a “no signal” message depending on your model.
Selecting the Correct Input Source
If you’re not seeing an image from your connected device, you might need to change the input source. Use the remote control to access the input menu, usually by pressing a button labeled “Input,” “Source,” or “HDMI.” Navigate to the correct input where you’ve connected your device and press Enter. The projector should now display the content from that device.
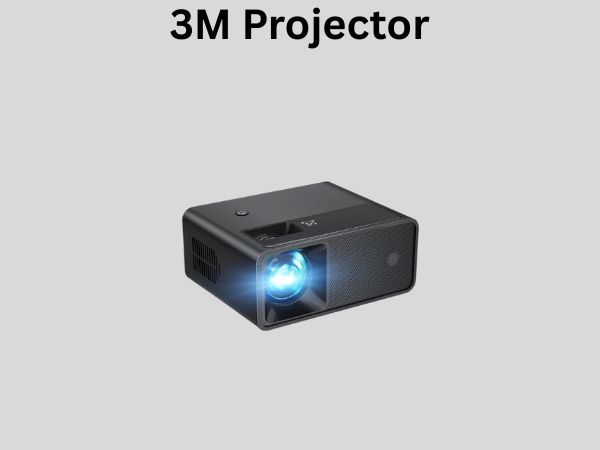
Adjusting Image Quality and Focus
Using the Focus Ring
The focus ring is located on the lens of your projector, usually as a rotating collar around the lens barrel. Start with a test image or content that you can clearly see. Slowly rotate the focus ring clockwise and counterclockwise while looking at the image on the screen. You’ll notice the image becoming sharper or blurrier as you rotate. Find the sweet spot where the image appears crisp and clear, with defined edges and text that’s easy to read.
Adjusting Brightness and Contrast
Using your remote control, navigate to the menu system, usually accessible through a “Menu” button. Look for image or picture settings. You’ll find options for brightness and contrast. Start by adjusting brightness to ensure the image isn’t too dim or washed out. Then fine-tune the contrast to make dark areas deeper and light areas more vibrant, without losing detail in either extreme.
Keystone Correction
If your projector isn’t positioned directly perpendicular to your screen, the image might appear trapezoidal (wider at the top or bottom) rather than rectangular. This is where keystone correction comes in handy. Access this feature through the menu system, and you’ll find options to adjust the image shape. Use the arrow keys on your remote to correct the vertical or horizontal distortion until the image appears as a perfect rectangle.
Color and Sharpness Settings
Most 3M projectors offer additional image adjustments including color temperature, saturation, and sharpness. The color temperature setting lets you choose between warm, neutral, or cool color tones depending on your preference and the lighting conditions in your room. Saturation controls how vivid colors appear. Sharpness enhances edge definition. Experiment with these settings to find what looks best to your eye, but remember that different content might benefit from different settings.
Mastering Your 3M Projector Remote Control
Essential Remote Buttons and Their Functions
Your remote control is your primary tool for operating the projector. The power button is straightforward—press it to turn the projector on or off. The input or source button lets you switch between connected devices. The menu button opens the projector’s settings menu. The arrow keys navigate through menus and on-screen text.
Most remotes also have dedicated buttons for functions like brightness and contrast. Some advanced models include buttons for specific features like color mode selection or ECO mode activation. Spend some time exploring your remote to understand all available functions. Your projector’s manual will have a complete diagram explaining each button.
Using the Menu System
The menu system is your gateway to advanced settings. When you press the menu button, you’ll see a series of options on the screen. These might include Picture, Sound, Setup, and Advanced options. Use the arrow keys to navigate and the Enter button to select. The Picture menu controls image-related settings like brightness, contrast, and color. The Sound menu adjusts volume and audio settings. The Setup menu handles lamp information, filter cleaning schedules, and other maintenance features. Advanced options provide deeper customization for experienced users.
Troubleshooting Common 3M Projector Issues
The Projector Won’t Turn On
If your projector won’t turn on, first check that it’s plugged into a working power outlet. Try plugging in another device to confirm the outlet is functional. If the outlet works but the projector still won’t turn on, try holding the power button for 10 seconds. Some projectors have a safety feature that prevents immediate restart. If it still won’t turn on after a few minutes, the lamp might need replacement, or there could be an internal issue requiring professional service.
No Image Appears on Screen
Before assuming the worst, check that your cables are properly connected to both the projector and your source device. Verify that you’ve selected the correct input source on the projector. If you’re using an HDMI cable, try a different HDMI port if your projector has multiple. Sometimes switching the input to HDMI 2 instead of HDMI 1 solves the problem. Also, confirm that your source device is actually powered on and displaying content.
Image Appears Blurry
Blurry images usually indicate a focus issue. Adjust the focus ring on the lens until the image becomes sharp. If the image remains blurry after focusing, the lens might be dirty. Gently clean the lens with a soft, lint-free cloth. Avoid using harsh chemicals that might damage the lens coating. Also check that your projector isn’t overheating; if it is, it might automatically reduce brightness and picture quality. Ensure adequate ventilation around the unit.
Strange Colors or Color Casting
If your image appears too red, blue, green, or has an overall color cast, access the picture menu and adjust the color temperature settings. Try switching between different color modes like Standard, Cinema, or Presentation to see which looks best. If you’re connecting via an older VGA cable, the color issue might be due to cable interference. Try replacing the cable or shortening its length if possible.
Overheating Warnings
If you see a temperature warning or if the projector’s fan becomes extremely loud, it’s overheating. Turn off the projector immediately and let it cool. Check that all vents are clear and not blocked by dust or objects. Clean the air filter if your projector has one. Ensure the projector isn’t in direct sunlight or near heat sources. If overheating persists, there might be a dust buildup inside the unit requiring professional cleaning.
Maintenance Tips for Long-Term Projector Health
Regular Lens and Filter Cleaning
Dust naturally accumulates on your projector’s lens and air filters over time. To maintain optimal image quality and prevent overheating, clean the lens gently with a soft, lint-free cloth every few months or as needed. For the air filter, check your manual for the cleaning schedule. Most projectors require filter cleaning every 100-200 hours of use. A clogged filter forces the projector to work harder and run hotter.
Monitoring Lamp Hours
Your 3M projector displays the lamp’s usage hours in the setup menu. Keep an eye on this number. When it approaches the lamp’s rated lifespan (usually indicated in your manual), start planning for a replacement. Using a lamp beyond its rated hours can damage it or cause it to fail unexpectedly during an important presentation.
Proper Shutdown Procedure
Always allow your projector to cool down for a few minutes after turning it off before unplugging it or moving it. The cooling period ensures the lamp cools properly and extends its lifespan. Never unplug the projector immediately after use, as this interrupts the cooling cycle.
Storage and Transportation
If you need to store or transport your projector, place it in a cool, dry location away from direct sunlight. Keep it in its original case if possible, or use a protective carrying case. Avoid stacking heavy objects on top of it. If you’re moving it, handle it gently and avoid sudden jarring movements.
Conclusion
Operating a 3M projector might seem complicated at first glance, but as you’ve learned throughout this guide