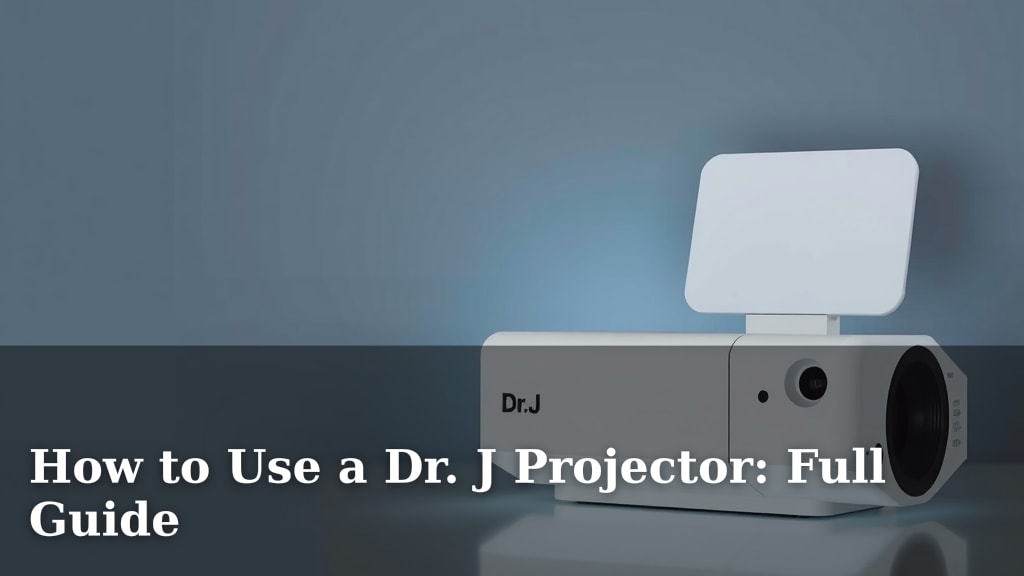
How to Use a Dr. J Projector: Full Guide
Getting your Dr. J projector set up is pretty straightforward. You’ll want to connect your video source, such as a laptop or streaming device, using the correct cable (like HDMI). Then, power on the projector and your device, and adjust the focus and keystone for a clear picture. That’s the basic idea for using your Dr. J projector!
Many people wonder about the best way to get the most out of their home theater experience. We found that understanding the different input options and how to properly adjust the image are key. Getting these settings right can make a big difference for your movie nights or presentations, turning a good setup into a great one with minimal effort.
- Connect your video source (laptop, streaming stick) to the projector.
- Power on both the projector and your source device.
- Adjust focus and keystone for a sharp, clear image.
- Select the correct input source on the projector.
Ready to turn your living room into a cinema? Let’s walk through exactly how to get your Dr. J projector up and running, step by step.
Getting Your Dr. J Projector Ready for Show Time
You’ve got your Dr. J projector, and you’re probably eager to dive into movie nights or exciting presentations. We understand that setup can sometimes feel a bit daunting. But don’t worry, we’re here to guide you through each step. You’ll be enjoying a big-screen experience in no time!
Understanding Your Projector’s Connections
Before anything else, let’s look at the ports on your Dr. J projector. Most models come with several ways to connect your devices. You’ll typically find HDMI ports, USB ports, and perhaps AV or VGA inputs. HDMI is the modern standard and usually offers the best picture and sound quality. It’s like the highway for your video signal. Research and found that HDMI is preferred for high-definition content.
HDMI Connection: The Go-To Choice
For most users, connecting via HDMI is the easiest and most effective method. Simply plug one end of your HDMI cable into your laptop, streaming stick (like a Roku or Fire Stick), or gaming console. Then, plug the other end into one of the HDMI ports on your Dr. J projector. Make sure your streaming device or computer is powered on and ready to go.
Other Connection Options
If HDMI isn’t an option, you might use a USB drive to play media files directly from the projector. Just insert your USB drive into the USB port. For older devices, AV or VGA connections might be available. You’ll need the appropriate cables for these. Always check your Dr. J projector’s manual for specific port availability and cable requirements.
Powering Up and Initial Setup
Once your devices are connected, it’s time to bring your Dr. J projector to life. First, plug the projector into a power outlet using its power cord. Then, locate the power button on the projector itself or on the remote control. Press it to turn the projector on. You should see a startup screen or logo appear.
Don’t Forget Your Source Device!
Remember, your projector is just the display. You also need to power on the device sending the signal. This could be your laptop, tablet, or streaming device. Some users forget this step and wonder why nothing is showing up! It’s a simple oversight, but crucial.
Adjusting for the Perfect Picture
Now for the part that really makes the difference: getting a clear, sharp image. Projectors often require a bit of tweaking. The most common adjustments are focus and keystone correction. These are your best friends for a great viewing experience.
Focusing Your Image
Look for a focus ring or knob, usually located around the lens. Turn this ring slowly while looking at the projected image. You’ll want to adjust it until the text and picture appear crisp and clear. If it looks blurry, keep turning until it sharpens up. Many found that small adjustments make a big difference here.
What is Keystone Correction?
Keystone correction deals with image distortion. If your projector is placed at an angle to the screen or wall, the image might look like a trapezoid instead of a rectangle. This is called keystone distortion. Most Dr. J projectors have a keystone adjustment dial or setting.
How to Use Keystone Correction
When you find distortion, gently turn the keystone dial. You’re aiming to square up the image. You want the top and bottom edges of the picture to be parallel to each other, and the sides to be straight. It might take a few tries to get it just right. We found that aligning the projector as straight-on as possible reduces the need for extreme keystone adjustments.
Selecting the Right Input Source
Your Dr. J projector can receive signals from multiple sources. You need to tell it which source to listen to. Use your projector’s remote control. Look for a button labeled “Input,” “Source,” or something similar. Pressing this button will bring up a menu on your screen. Cycle through the available inputs (HDMI 1, HDMI 2, AV, USB, etc.) until you see the picture from your connected device.
Common Input Scenarios
If you connected your laptop via HDMI, select the corresponding HDMI input on the projector. If you’re using a USB drive, select the USB input. It’s usually a straightforward process. We recommend keeping track of which port you used for which device to avoid confusion later.
Optimizing Your Viewing Environment
Even with perfect setup, your room plays a big role. Projectors work best in dim or dark environments. Think of it like how you enjoy movies in a cinema. For the best picture quality, draw your curtains, dim the lights, and minimize ambient light. This will make your Dr. J projector’s image pop with vibrant colors and deep contrast.
Screen vs. Wall
While you can project onto any flat, light-colored surface, using a dedicated projector screen will significantly improve your viewing experience. Screens are designed to reflect light optimally. This results in a brighter, more uniform image. If you don’t have a screen, a smooth, white wall is your next best bet. Avoid textured or colored walls if possible.
Quick Setup Checklist for Your Dr. J Projector
- Connect your video source to the projector using an HDMI cable for best results.
- Ensure both the projector and your source device are plugged in and powered on.
- Adjust the focus ring until the image is sharp and clear.
- Use the keystone correction to make the projected image a perfect rectangle.
- Select the correct input source (e.g., HDMI, USB) on the projector using the remote.
- Dim the lights in your room for the most vibrant and clear picture.
Conclusion
You’ve now learned the essentials for getting your Dr. J projector up and running. We covered connecting your devices, powering everything on, and crucially, adjusting for that perfect picture with focus and keystone settings. Remember, a dark room and a good surface make a big difference too. Now you’re all set to enjoy your movies and presentations on the big screen! Your next step is to gather your favorite content and start that home cinema experience you’ve been dreaming of.
Frequently Asked Questions
My Dr. J projector won’t turn on. What should I check?
First, ensure the projector is securely plugged into a working power outlet using its power cord. Also, double-check that you’re pressing the power button correctly, either on the unit or the remote. If it still doesn’t respond, try a different outlet or consult your projector’s manual for troubleshooting steps.
How do I connect my smartphone to a Dr. J projector?
Connecting your smartphone typically requires an adapter. You’ll likely need an HDMI adapter specific to your phone’s model (e.g., a Lightning to HDMI adapter for iPhones or a USB-C to HDMI adapter for many Android phones). Connect the adapter to your phone, then use an HDMI cable to link it to the projector’s HDMI input.
Why is the image on my Dr. J projector blurry?
A blurry image is usually due to incorrect focus or a dirty lens. Gently turn the focus ring located around the projector’s lens until the image appears sharp. If that doesn’t help, carefully clean the lens with a soft, microfiber cloth. Ensure you’re also projecting from an appropriate distance.
Can I play movies directly from a USB drive on my Dr. J projector?
Yes, most Dr. J projectors support playing media files directly from a USB drive. Simply insert your USB drive into the designated USB port on the projector. Then, use your remote to select the USB input source and navigate through your files to choose the movie you want to watch.
How do I fix a picture that looks like a trapezoid?
This distortion is called keystone effect and is fixed using keystone correction. If your projector is angled upwards or sideways, the image will warp. Locate the keystone adjustment dial or setting on your projector and turn it gently until the projected image forms a perfect rectangle. Try to position the projector as straight-on as possible to minimize this.